All articles
Financial Fields for Budgeting
Table 53. Availability
Wrike Resource |
Wrike for Professional Services |
Wrike for Professional Services Performance | |
Wrike’s Budgeting provides you with a predefined set of financial fields that automatically calculate projects’ essential financial metrics you can use to plan the projects’ scope and budget and track your profitability.
Note
For projects created before the release of the Budgeting features on October 19, 2020, you need to enable hourly rates to see the calculations in the financial fields.
-
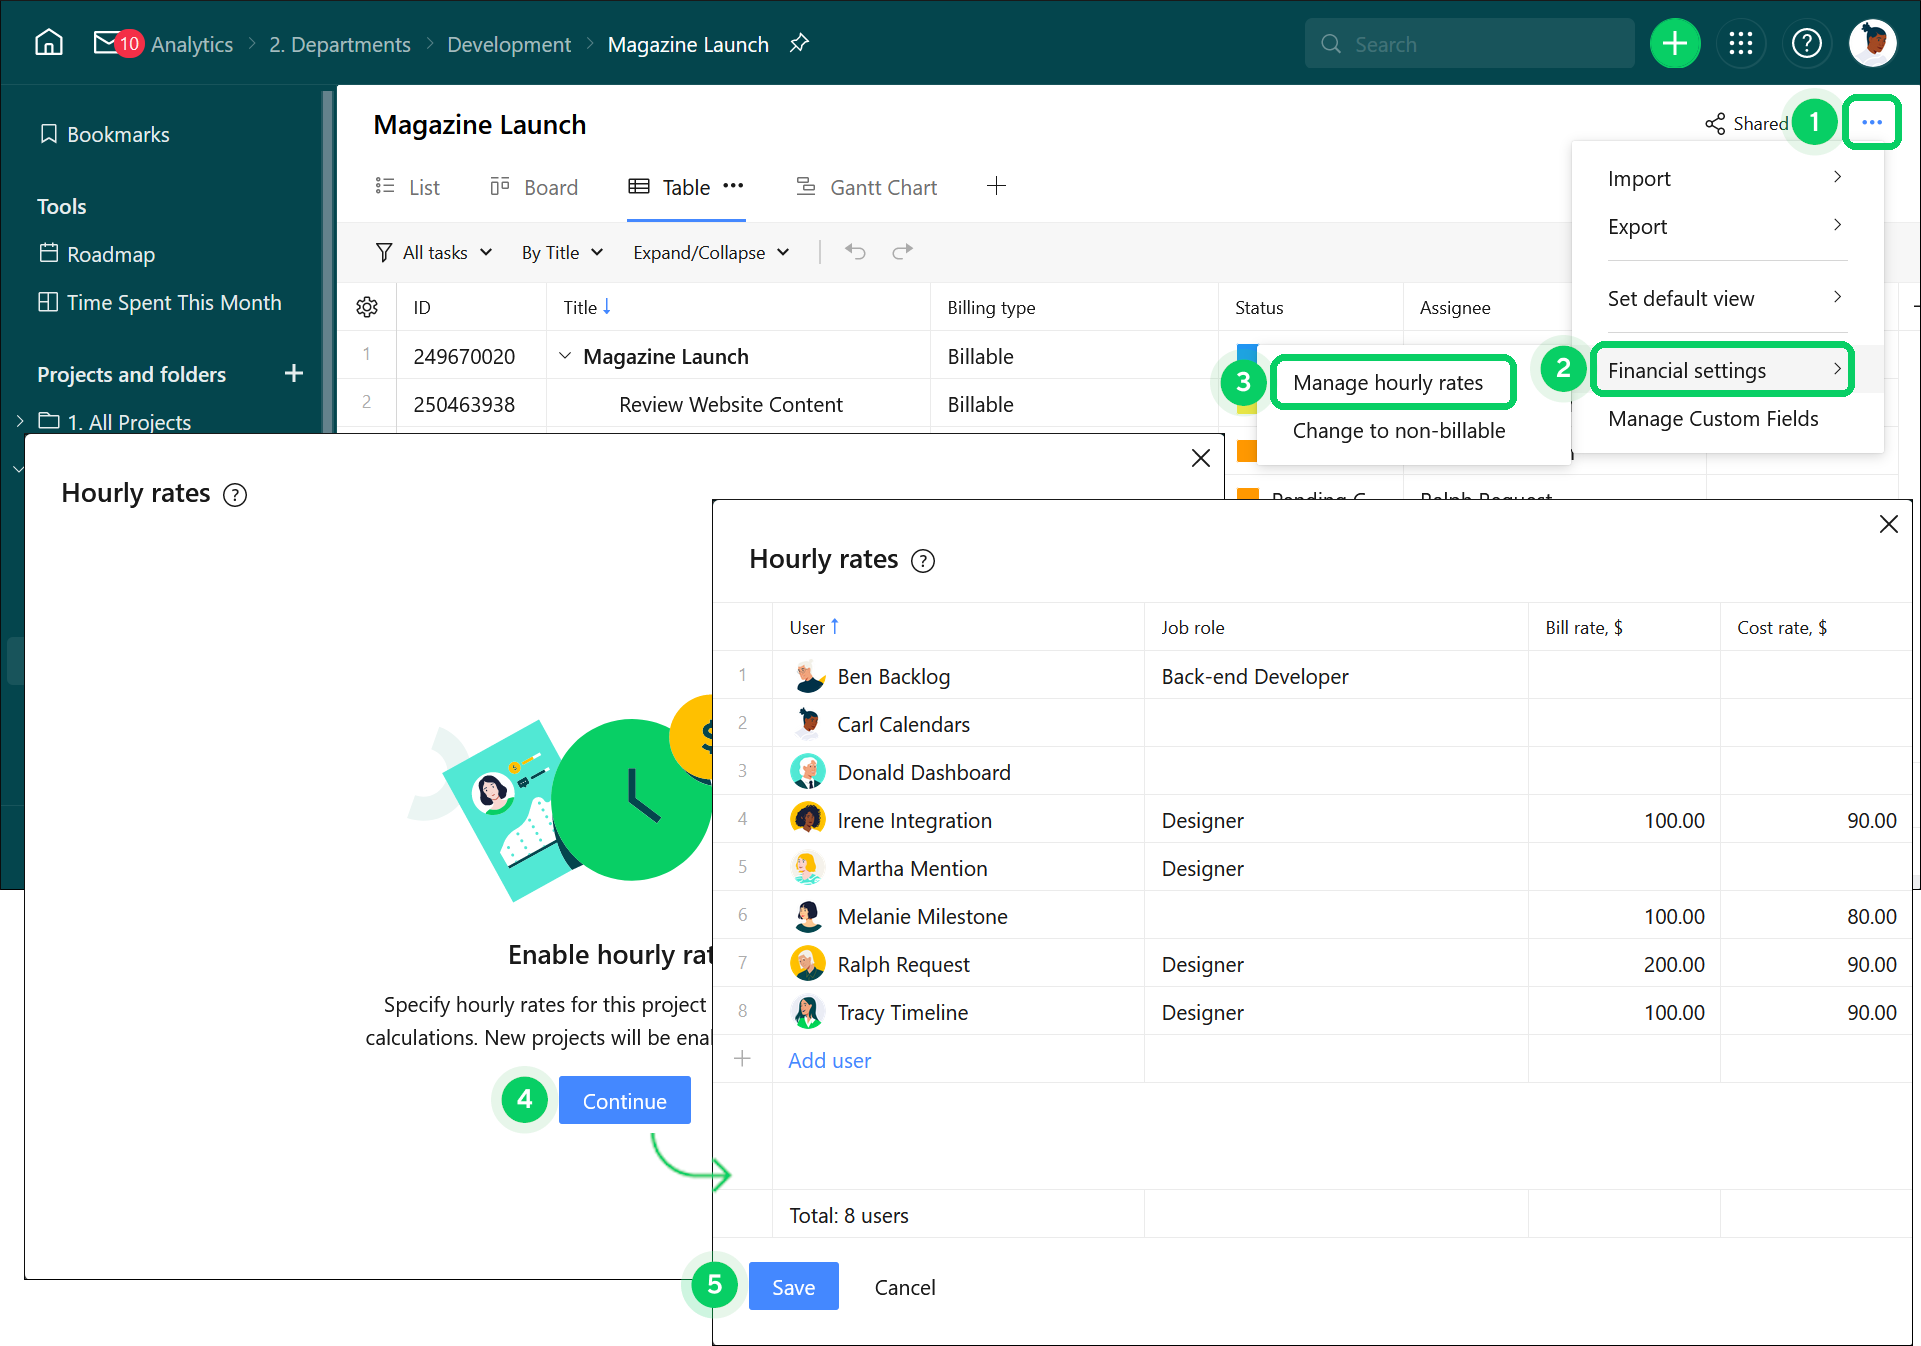
Start by using one of these three options:
Open the project and click the three-dot menu button in the upper-right corner. 1
Open the project in Table view and right-click its title.
Open the project’s info panel and click the three-dot menu button in the upper-right corner.
Hover over Financial settings. 2
Select Manage hourly rates. 3
Click Continue in the pop-up that opens. 4
Make the changes to bill or cost rates if necessary.
Click Save. 5
Tip
The planned and actual costs and fees are calculated separately for each task in a project. To see the full sum of these numbers for the project, you need to roll up the data from Actual fees, Actual cost, Planned fees, and Planned cost fields in the Table view.
Field |
Calculation formula |
Description |
|---|---|---|
|
Budget Available in:
|
- |
In this field, you manually enter the number that defines the project’s budget. TipTo calculate the remaining budget, create a calculated custom field using the formulas “[Budget] - [Actual fees]” or “[Budget] - [Actual cost].” |
|
Actual fees Available in:
|
Actual fees = Users’ time spent * Users’ bill rate Users’ time spent is the sum of all time entries that the user(s) added for a particular task. User’s bill rate is the hourly bill rate that you specify for the user(s) or for their job role. |
In the Table view, this field automatically calculates and displays the actual bill amount for each task. Note
|
|
Actual cost |
Actual cost = Users’ time spent * Users’ cost rate Users’ time spent is the sum of all time entries that a user(s) added for a particular task. User’s cost rate is the hourly cost rate that you specify for the user(s) or for their job role. |
In the Table view, this field automatically calculates and displays the actual cost of resources for each task. NoteIn Timelog view, the Actual cost is calculated for each user separately. |
|
Planned fees |
Planned fees = Users’ effort * Users’ bill rate Users’ effort is the sum of hours that you enter in the Effort section of each task to estimate how much time it will take the user(s) to finish it. User’s bill rate is the hourly bill rate that you specify for the user(s) or for their job role. |
This field automatically calculates and displays the planned bill amount for each task. NotePlanned fees are not calculated for non-billable tasks. |
|
Planned cost |
Planned cost = Users’ effort * Users’ cost rate Users’ effort is the sum of hours that you enter in the Effort section of each task to estimate how much time it will take the user(s) to finish it. User’s cost rate is the hourly cost rate that you specify for the user(s) or for their job role. |
This field automatically calculates and displays the planned cost of resources for each task. |
Note
If a task is located only in a folder, and it doesn’t belong to any project, then the financial metrics — actual and planned fees and cost — will not be calculated.